Get notified! How to set up email notifications in iOS 12
Email notifications in iOS 12 are easy to set up and can be very powerful if you know how to use them properly. This article will teach you what email notifications are, why they are useful, and show you step-by-step how to enable email notifications for any of your applications in iOS 12. Are you ready? Let’s get started!
- Setting Up Notifications on iPhone:
- Launch the Settings app and select Notifications.
- Scroll down and make sure that nothing is turned on for your iPhone, like When Locked or When on Wi-Fi.
- Search for Mail from the list of apps. When you find it, toggle it to turn it off if it’s already on or switch its notification type from None to a more specific option like Inbox, which will let you know when you receive new emails without having to constantly check your inbox.
Setting Up Notifications on iPad:
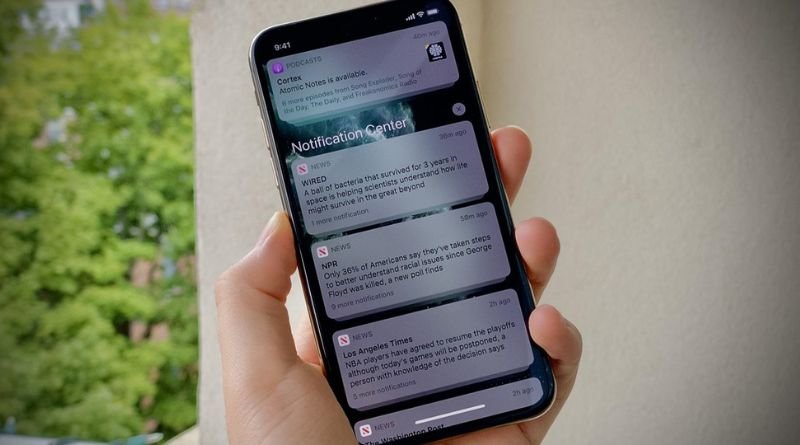
Notifications can be found in the bottom left corner of your home screen. Tap the Not’d Badge to find and manage your notifications. For each notification, there is a toggle switch to either enable or disable it and a detail button that takes you into the app for more information. The notification center is where all of your notifications from both apps and iMessage are grouped together on one page so you never miss an important update again!
Turning Off Notifications:
Open Settings on your iPhone. Touch Notifications. Make sure Do Not Disturb is turned on so you’re not interrupted by any alerts. If you don’t want an app to send you notifications, swipe left on the app and tap Don’t Allow. To turn off notifications for an app, scroll down and tap Don’t Allow
Setting Up Automatic Downtime:
You can also let the phone or tablet know when you need privacy. The Downtime mode will automatically go on and disable all notifications. It’s a handy way to stop your inbox from distracting you at night or anytime it’s not convenient for you to be online. To turn on this feature, open Settings > Screen Time > Downtime and select how many hours at a time you would like it to be active. When that timer hits zero, your device will disable all distractions until the next period of downtime.
Getting More Details about the Notification:
Every time someone messages you on iMessage, they’ll show up as a little bubble with their name. This is all well and good, but what if you get tons of messages? There’s no way to tell them apart since they’re all just that same ol’ blue circle. You may want to consider setting up the Notification Center so that emails are included in this list. To do this, go into your Settings app and scroll down until you see Notifications at the very bottom. Tap on it, then select Mail from the menu of options.
Setting Up Priority Mode:
If you want to cut down on noise and only allow the most important emails through, setting your iPhone or iPad’s Priority Mode is a good place to start. Simply go into your Settings app, tap on Mail, Contacts, Calendars and then find the section for Mail. Underneath the General heading, click the box next to Senders Can’t Contact Me if it’s not already enabled. Then scroll down until you see Priority Mode and turn it on. That’s all there is to it! If you’re worried about missing an important email while Priority Mode is enabled, just whitelist that sender before turning it on. Otherwise they’ll just continue sending out emails while they think they’re talking directly with Apple – which won’t do anyone any good.